2026-05-06
Maybe coding wasnt the Great Filter killing companies after all.
2026-04-08
Whenenver I get adocument—like mail and stuff—I scan it and upload it to Dropbox. When I do, I name it in the format date and month followed by a short description. For a February 13th dentist appointment invoice, I might have:
02_13-dentist_invoice.pdfNaming those files, though, isn’t something I particularly enjoy doing. It’s not the coming up with the name so much as it is typing it out. Those underscores and dashes can get tricky. When I had a desktop scanner and was doing it on my mac it was one thing, but switching between the symbols and characters keyboard on iOS to get it just right is a challenge. There’s friction, and friction invites excuse to neglect.
In the back of my head, there’s been a project I could do that is having AI come up with the name. That feels like one of those things that AI should be capable at. And it would be a good chance to try out a local model. The idea of scanning all my important tax and medical documents and shipping them off the Anthropic made me uneasy.
One of the reasons I hadn’t moved this project forward is that I felt like running locals models Was Hard — tho I’m not really sure why. Then google released the Gemma 4 models for running locally, and I figured “if Google was releasing it, it couldn’t be that hard to get set up.”
Over the course of a few hours on Sunday morning I whipped something up.
Getting the model running wasn’t particularly difficult. I basically followed the instructions here. Some of the commands weren’t exactly right, or at least didn’t work out the gate, but Claude Code was able to correct them. Using Llama I could run the models in API mode, making them compatible with the OpenAI SDKs.
From there, I wrote a script that checked a designated “input” folder in my Dropbox for new files. When it finds one, it would convert the PDF to an image (the local LLM doesn’t / wouldn’t accept PDFs directly), and then pass it to the LLM. The LLM returns the description part after the dash. I format that, concatenate it with the current date, and then move it to the destination folder.
Overall, the implementation was a success. There are a few bugs still. Primarily, it sometimes gives me a completely whack name like
04_05-A_short_descriptive_title_for_the_document,_suitable_for_a_file_name..pdf. I’ve also still not given it full access to my Dropbox documents. The “destination” folder is currently just a sibiling to the input folder. I still have to move them into the right place. Once I get some more of the bugs worked out, I’m going to give the project access to that too. It should have tool access, so I’d really love to give the LLM the ability to just put the folder in the right place as well.2026-03-31
I’ve come around to the idea of keeping your commits clean, probably too far late in life. Automated linting helped a lot with that. Since most of my projects are Node.js based, I’ve landed on commitlint as my tool of choice.
Now, commitlint out of the box gives you a lot of options for the commit types (this is the part usually at the beginning, like
feat,test, etc.:- feat
- fix
- build
- chore
- ci
- docs
- perf
- refactor
- revert
- style
- test
Clarity is good, but when authoring a commit message I want to limit the amount of decision that I have to make. Some choices are clear, but it can get messy quick. If my commit includes both tests and a feature, what do I do? “Those should be different commit” could be an answer, but I tend to lean on the side of everythting for a new feature being bundled in a single commit, which often means that things like
tests,styles, and thefeature itself are getting grouped in one commit.Ultimately, I don’t want to have to make a lot of decisions when I’m authoring a commit, and so I’ve simplified it down to the three possible things I believe I could possibly be commiting:
- for commits that are authoring new features:
feat - for commits that are fixing a broken part of the codebase:
fix - for basically everything else:
chore
I also allow
wipfor when I’m working on something in smaller chunks that are going to be squashed later (at which point, I’ll pick one of the above three).The
commitlintconfig I typically start projects out with looks like this:module.exports = { extends: ['@commitlint/config-conventional'], rules: { 'type-enum': [2, 'always', ['chore', 'feat', 'fix', 'wip']], }, };2026-03-31
Interesting essay about storage. I’ve been noodling on a storage system for a while, and while I don’t think this is the thing I need, it’s giving me some ideas.
2026-03-17
Autonomous.ai released an AI product called Intern. It’s a packaged Open Claw instance that lives on your desk.

I’m not a Claw person, so this product already isn’t for me, but I definitely don’t want this lol. What kind of person wants a sinister, glowing pyramid on their desk 24/7?

The clearly AI generated product image feels so unnecessary. You have the product. There are product images on the page. It feels so unnecessary.
2023-07-24
Over the last year I’ve been developing a design system / component library to use in my side-projects. At the base is a component called
Block, upon which most of the styles get applied. The interface ofBlockfocuses on configuration of atomic properties at the React component prop level. So for example, setting the padding and margin of a button is done like this:<Block padding="0.25" marginRight="1" tagName="button"> Hello World </Block>I wanted the implementation to have a very strict, type-safe interface, but the repetitive nature of it was starting to weigh on me.
interface BlockProps {
	padding: string;
	paddingTop: string;
	paddingBottom: string;
	paddingLeft: string;
	paddingRight: string;
	margin: string;
	marginTop: string;
	marginBottom: string;
	marginLeft: string;
	marginRight: string;
}
Maintaining this was time-consuming, and updating did not scale particularly well. Plus margin and padding props were basically the same except their name. I resolved to abuse every feature TypeScript afforded me to do this. At the center of it all is this type:
export type Mapping<T extends string, R = string> = {
    [K in T]: R;
};
This is a mapped type. It allows me to define a type that has the keys
R, and the typeTfor each of those keys (It was also brought to my attention thatMappingis basically just a backwardsRecord, so use that instead if you intend to walk this path). For padding, to have each directional prop and an overall padding, I’d define something like this:type PaddingProps = Mapping<string, 'padding' | 'paddingTop' | 'paddingBottom' | 'paddingLeft' | 'paddingRight';which is equivalent to
interface BlockProps {
	padding: string;
	paddingTop: string;
	paddingBottom: string;
	paddingLeft: string;
	paddingRight: string;
}
Looking at this, I wondered if I could decouple
paddingfromTop,Bottom,Left, andRight, especially as I was adding more props that had directions variants. To do this, I created a generic type consisting of a union type of the type itself, and template literal types for each direction. Then I used that in theMappinginstead of an explicit union type.type DirectionOptions<T extends string> = | `${T}Top` | `${T}Bottom` | `${T}Left` | `${T}Right` | `${T}`; type PaddingProps = Mapping<string, DirectionOptions<'padding'>>;This also lets us easily define the directional props for margin.
type MarginProps = Mapping<string, DirectionOptions<'margin'>>;Finally, I wanted to make it so that you could set the hover styles for properties. The way I wanted them to manifest was to have an additional field for each already existing field that appended the text
Hover.paddingTopwould have an associatedpaddingTopHover,paddingBottomandpaddingBottomHover, etc. This combines the technique used forMappingwith thekeyofoperator. For each key in the supplied type, a new property is added using a template literal to expand its name to includeHover.export type Hoverable<Type> = { [Property in keyof Type as `${string & Property}Hover`]: Type[Property]; };Applying
HoverabletoBasePaddingPropsbelow produces a type with the expectedxxxHover, props:interface BasePaddingProps { padding: string; paddingTop: string; paddingBottom: string; paddingLeft: string; paddingRight: string; } type PaddingProps = Hoverable<BasePaddingProps>; interface PaddingProps { // equivalent to above ^^^ padding: string; paddingTop: string; paddingBottom: string; paddingLeft: string; paddingRight: string; paddingHover: string; paddingTopHover: string; paddingBottomHover: string; paddingLeftHover: string; paddingRightHover: string; }Combining it with our previous properties, we can easily generate hoverable padding and margin types:
type PaddingProps = Hoverable<Mapping<string, DirectionOptions<'padding'>>>;
type MarginProps = Hoverable<Mapping<string, DirectionOptions<'margin'>>>;
This implementation is certainly a tradeoff. The interface it produces is really clean. It lets me move fast, and adding additions onto this
Blockinfrastructure is simple. However, from an outsider’s perspective, as I found out sharing my journey piecemeal with my friends and peers, it seems kind of whack. There’s something about[Property in keyof Type as`${string & Property}Hover`]: Type[Property];that doesn’t quite roll off the tongue very well.
2023-07-12
I've recently bought a nRF52850 DK from Nordic Semiconductor to try my hand at making Matter-based devices. I like it, and I've had little trouble building and running the provided samples. However, now that I've moved onto trying to do my own implementations, I've been running into issue after issue. Fortunately, the support teams at Nordic Semiconductor have been really helpful and committed to debugging these problems. That said, the solutions are disperate, and often hard to find or use. They're spread across the forums, private email threads, and are compounded by the fact that engineers are using the tools across Windows, Linux, and macOS.
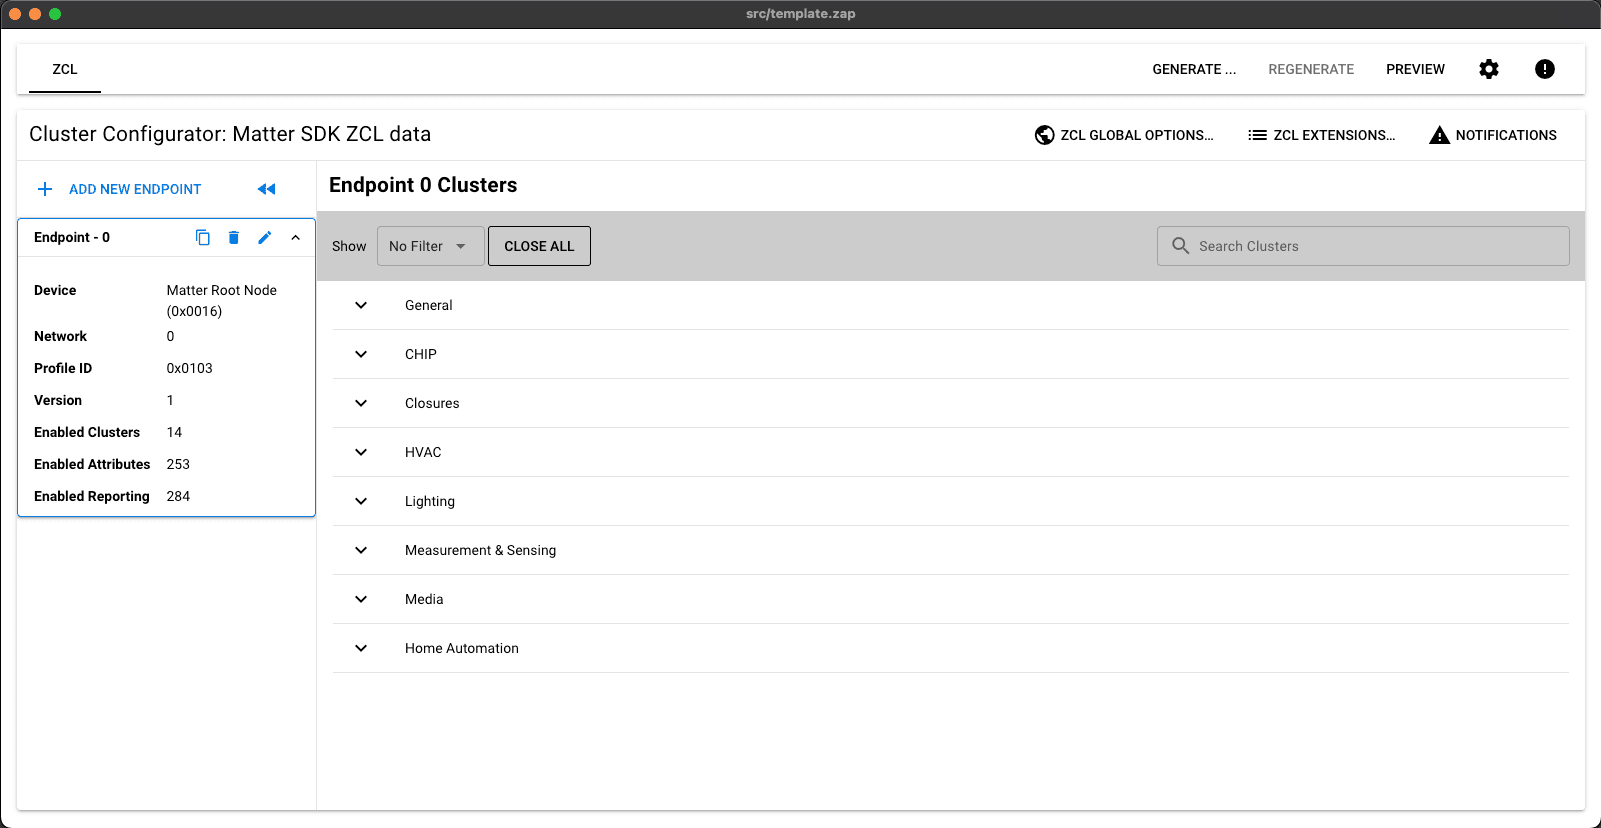
The first major place I've been having issues is with the ZAP tool. It's the tool used for adding Matter cluters to your application, at outlined in this tutorial. After following the instructions to install here, you'll get an instruction to add the ZAP locations to your path. It probably looks something like this:
#############################################################################################
# Please add the following location(s) to the system PATH:                                  #
# /opt/nordic/ncs/v2.4.0/modules/lib/matter/zap_location/zap-mac/zap.app/Contents/MacOS/zap #
# /opt/nordic/ncs/v2.4.0/modules/lib/matter/zap_location/zap-mac                            #
#############################################################################################
For me, this doesn't work. Upon repoenenig the terminal and running
zap src/template.zap, it'll tell me the zap command is not found.command not found: zapI needed to cut the
/zapof the end of the first path for it to be able to find thezapcommand. After that, the command will execute.Note: it doesn't say it explicity (or I didn't see it), but the steps assume you're starting from the root folder of the sdk. On my machine that's
/opt/nordic/ncs/v2.4.0.After getting past the above issue, when trying to run ZAP I encountered an error message that says something like this:
dyld[1660]: Library not loaded: @rpath/Electron Framework.framework/Electron Framework
  Referenced from: <4C4C44DA-5555-3144-A10D-1E87A10EA9F8> /opt/nordic/ncs/v2.4.0/modules/lib/matter/zap_location/zap-mac/zap.app/Contents/MacOS/zap
  Reason: tried: '/opt/nordic/ncs/v2.4.0/modules/lib/matter/zap_location/zap-mac/zap.app/Contents/Frameworks/Electron Framework.framework/Electron Framework' (not a mach-o file), '/opt/nordic/ncs/v2.4.0/modules/lib/matter/zap_location/zap-mac/zap.app/Contents/Frameworks/Electron Framework.framework/Electron Framework' (not a mach-o file), '/System/Volumes/Preboot/Cryptexes/OS@rpath/Electron Framework.framework/Electron Framework' (no such file), '/opt/nordic/ncs/v2.4.0/modules/lib/matter/zap_location/zap-mac/zap.app/Contents/Frameworks/Electron Framework.framework/Electron Framework' (not a mach-o file), '/opt/nordic/ncs/v2.4.0/modules/lib/matter/zap_location/zap-mac/zap.app/Contents/Frameworks/Electron Framework.framework/Electron Framework' (not a mach-o file), '/Library/Frameworks/Electron Framework.framework/Electron Framework' (no such file), '/System/Library/Frameworks/Electron Framework.framework/Electron Framework' (no such file, not in dyld cache)
[1]    1660 abort      zap nrf/samples/matter/template/src/template.zap
This is after following the instructions to install here to install the tool. A thread posted on the forums suggest to install the tool without using the provided script, using this instead:
wget github.com/.../zap-mac.zip && unzip -d zap-mac zap-mac.zipI ran that from my root sdk folder, and ended up recreating the folder structure that the download script creates, and moving the unziped contents there:
/opt/nordic/ncs/v2.4.0/modules/lib/matter/zap_location/zap-mac/zap.app/Again I tried running
zap src/template.zap, now encountering a new error:Error while running sql statement: INSERT INTO ENUM (ENUM_ID, SIZE) VALUES ( (SELECT DATA_TYPE_ID FROM DATA_TYPE WHERE PACKAGE_REF IN (2) AND NAME = ? AND DISCRIMINATOR_REF = ?), (SELECT CASE WHEN ( (SELECT SIZE FROM ENUM INNER JOIN DATA_TYPE ON ENUM.ENUM_ID = DATA_TYPE.DATA_TYPE_ID WHERE DATA_TYPE.PACKAGE_REF IN (2) AND DATA_TYPE.NAME = ? AND DATA_TYPE.DISCRIMINATOR_REF = ?) IS NULL ) THEN (SELECT SIZE FROM ENUM INNER JOIN DATA_TYPE ON ENUM.ENUM_ID = DATA_TYPE.DATA_TYPE_ID WHERE DATA_TYPE.PACKAGE_REF IN (2) AND DATA_TYPE.NAME = ?) ELSE (SELECT SIZE FROM ENUM INNER JOIN DATA_TYPE ON ENUM.ENUM_ID = DATA_TYPE.DATA_TYPE_ID WHERE DATA_TYPE.PACKAGE_REF IN (2) AND DATA_TYPE.NAME = ? AND DATA_TYPE.DISCRIMINATOR_REF = ?) END AS SIZE)), values: ProductFinishEnum,3,enum8,3,enum8,enum8,3, Error: SQLITE_CONSTRAINT: UNIQUE constraint failed: ENUM.ENUM_IDAs best I could understand from email threads with support, this is from trying to pull in the proper Matter cluster templates and definitions since they're not shipped with ZAP by default.
I started looking for other solutions to the Electron Framework problem, which brought me to this thread on the Matter GitHub repository. Essentially the unzip functionality doesn't prefer symlinks. This time I installed the current released version from the repository releases (specifically v2023.05.04), placing it in the same spot like I did with the previous fix.
This time, the magic happened! The ZAP tool opened with the expected Matter definitions.
2023-07-08
When setting up the chip tool for testing matter devices on macOS, you might run into issues with the build command
./scripts/examples/gn_build_example.sh examples/chip-tool BUILD_PATHFor me, it reported a bunch of errors like these:
...

The target:
  //third_party/connectedhomeip/third_party/libwebsockets:libwebsockets
has a source file:
  //third_party/connectedhomeip/third_party/libwebsockets/repo/lib/system/system.c
which was not found.
___________________
ERROR at //third_party/connectedhomeip/third_party/libwebsockets/BUILD.gn:33:1: Source file not found.
source_set("libwebsockets") {
^----------------------------
The target:
  //third_party/connectedhomeip/third_party/libwebsockets:libwebsockets
has a source file:
  //third_party/connectedhomeip/third_party/libwebsockets/repo/lib/roles/ws/ops-ws.c
which was not found.
___________________
ERROR at //third_party/connectedhomeip/third_party/jsoncpp/BUILD.gn:26:1: Source file not found.
source_set("jsoncpp") {
^----------------------
The target:
  //third_party/connectedhomeip/third_party/jsoncpp:jsoncpp
has a source file:
  //third_party/connectedhomeip/third_party/jsoncpp/repo/include/json/allocator.h
which was not found.
___________________
ERROR at //third_party/connectedhomeip/third_party/editline/BUILD.gn:30:1: Source file not found.
static_library("editline") {
^---------------------------
The first step in Building the CHIP Tool says
Install all required packages for Matter and prepare the source code and the build system. Read the Building Matter guide for instructions.
I think incorreclty assumed that was completed when setting up the nRF SDK. You should have the Matter repository installed under
/modules/lib/matter, but you still have to rungit submodule update --initin that directory.2021-09-26
Seventy-nine days after packing up my things, trekking across the Appalachian Mountains, and settling in Manhattan’s Upper West Side, I’m turning around and reversing the process.
When I took the job that would ultimately bring me here, I spoke with absolute confidence that New York City wasn’t just some place I thought I wanted to be. It was the place I needed to be. However, I’ve come to find that living here makes me absolutely miserable. How miserable? has been hard to universally impress upon people, so you’ll have to take my word for it when I say this is the saddest I’ve ever been.
It’s been a lengthy journey of self-reflection as to how I could have made such a catastrophic miscalculation. Divulging every aspect would be difficult; partly because of how personal it is and partly because it’s kind of a long story. But I’m sure now that this isn’t the right place for me. Hours of advice from family, friends, and professionals made me realize that the value of new roots planted here aren’t worth the cost when compared to cultivating the ones I have deeper, elsewhere.
That said, I feel the need to make one thing absolutely clear: don’t feel too bad for me. Yeah it sucks, but I truly have no regrets about the move to New York. I believed I needed to be here, so without coming I couldn’t have known the truth. I am incredibly grateful to have had the chance to get this life choice so wrong and learn something so valuable from it.
Finally, What’s next? Everyone’s asked me this, and, honestly, you know about as much as I do. I have no real long-term plan at this point. I’m going home, I’m taking a break, and I’ll figure it out from there.

2021-04-13
Sometimes when I’m working on a particularly complicated feature I’ll amend onto my current commit in little working chunks. I generally recommend this practice, but I’ll occasionally run into an issue where I amended a commit with something that’s broken. When I want to cut off the most recent commit and start over. I’ll just
git reset HEAD~1, but in a case like this there’s a lot of work in the current commit I’d like to keep.In cases like this, you can make use of
reflogto see a more detailed history of you commits.git reflogwill show you something like this:44e56e8 HEAD@{1}: commit (amend): Move all dialogs to same package d62a3e2 HEAD@{2}: commit (amend): Move all dialogs 90654b0 HEAD@{6}: commit: Move all dialogs to same package d949095 HEAD@{7}: commit: Remove unused dialogs e8cac49 HEAD@{8}: commit: Implement new suprise dialog e9b67e2 HEAD@{9}: commit (initial): Refactor dialogs to share a base componentThe last two “commits” are both amends, adding onto the
90654b0.Now, let’s say I wanted to chop off my most recent amend. To do this, I can do a soft reset like so:
git reset --soft @{1}Now doing a
git statusyou should see your most recent changes upstaging and ready for modifying.The full details of a soft reset can be found here.